Simple ladybug science means that you must spend time observing the bugs.
Ladybug Science Lesson
What Is A Ladybug?
Ladybugs are insects, part of a group called beetles. Even though they are called ladybugs, not all of them are females!
All insects, including ladybugs, have three main body parts: a head, thorax, and abdomen. They have six legs, two antennae, and special compound eyes so they can see in many directions at once. Many insects have wings. For more details about insect anatomy, classification, and habitats, visit our Insect Investigations page.
Learn about the parts of a lady bug after catching ladybugs in the ‘Ladybug Investigation’ project featured below.

Ladybug Life Cycle
Just like all beetles, ladybugs go through different stages of life. Young ladybugs actually don’t look anything like the pretty red and black adult ladybugs we are all used to seeing. If you saw one that wasn’t an adult yet, you might not even recognize it. The stages that ladybugs go through are all steps in a very complex process called metamorphosis. (Other beetles, butterflies, and amphibians like frogs go through metamorphosis too!)
Stage 1: Egg
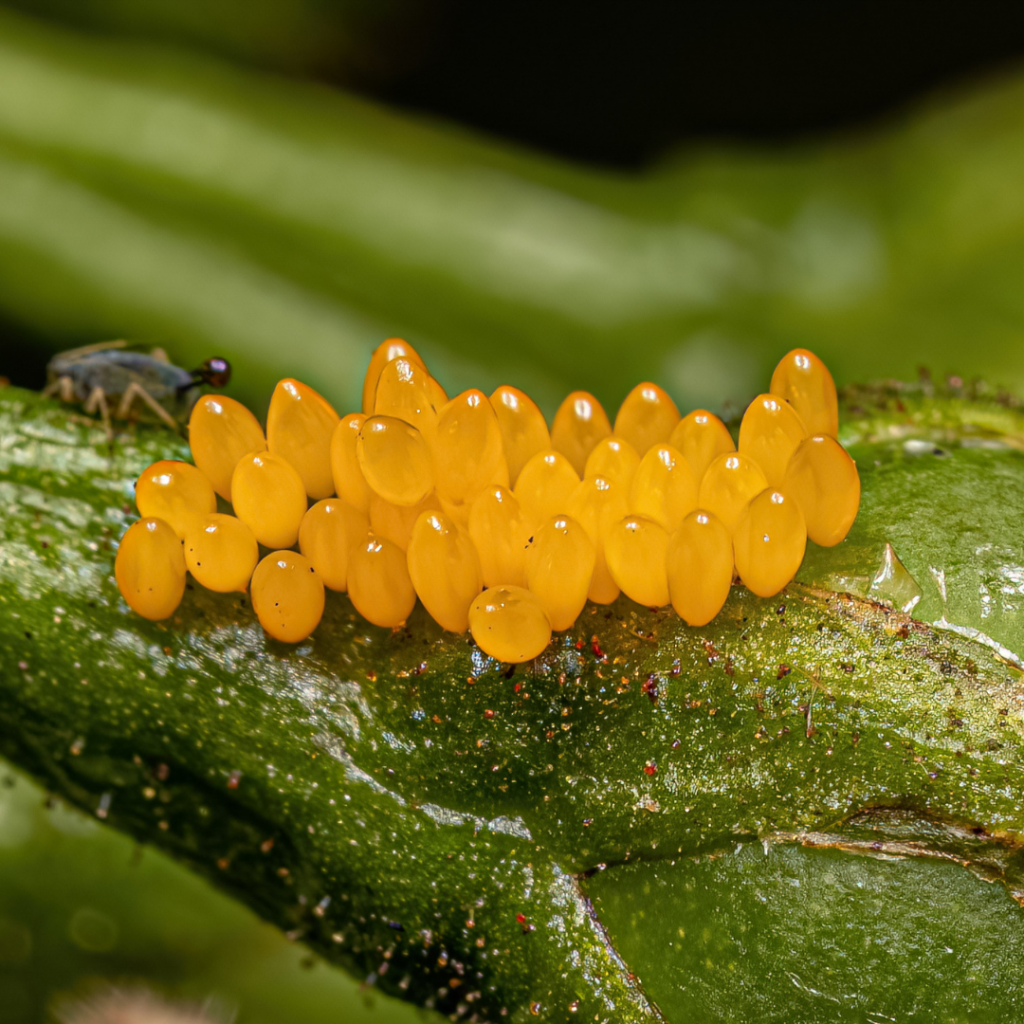
A female ladybug lays a cluster of tiny yellow eggs. Ladybugs usually lay eggs on leaves where there will be plenty of food for the babies when they hatch. After about one week, the eggs will hatch and small odd-looking creatures appear!
Stage 2: Larva
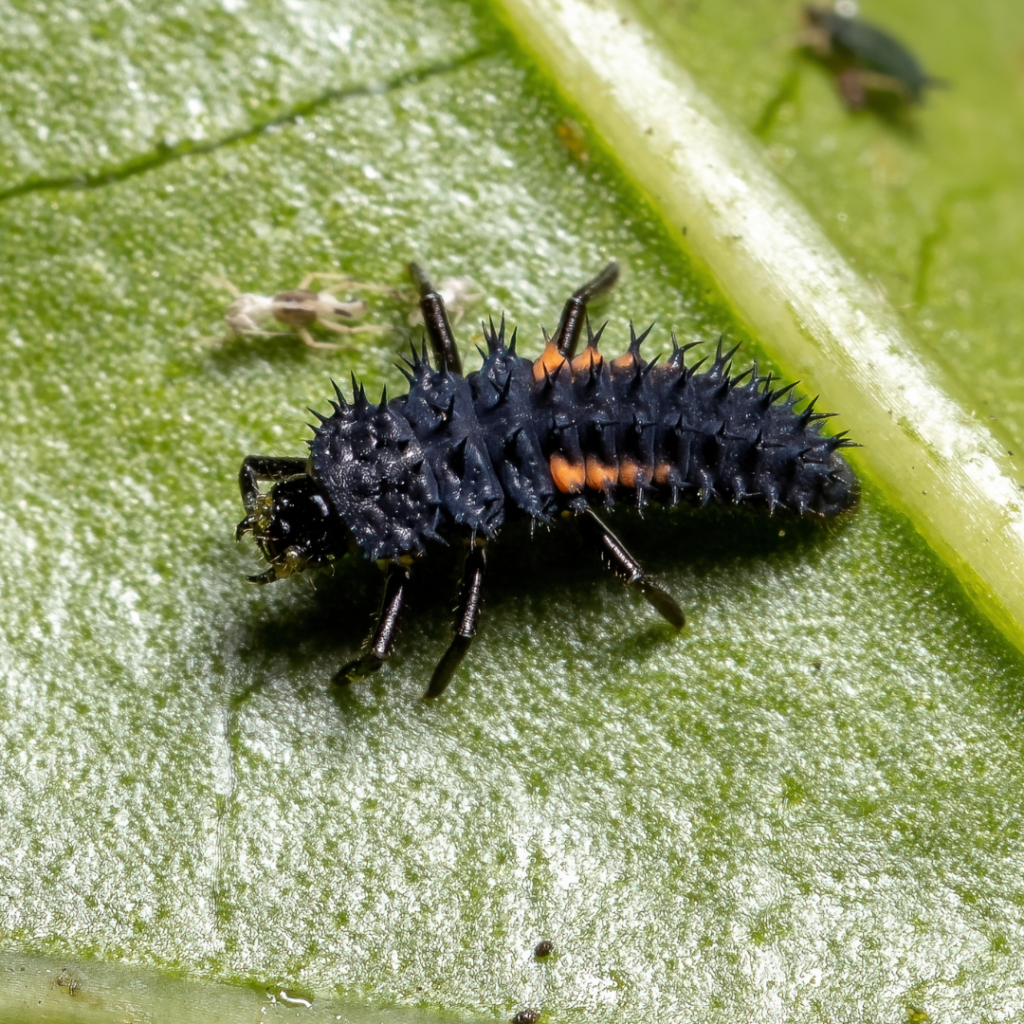
The odd-looking creatures that hatch out of the eggs are called larva (larvae if there are more than one).
They have long bodies with six legs. They are mostly black with colored spots and they look sort of like little alligators. The ladybug will live as a larva for about two to four weeks of its life. During that time, the larva will shed its skin several times.
Each time, the skin underneath allows it to grow a little bit bigger. While it is a larva, the ladybug will eat a lot; it can eat as many as 400 aphids! When the larva has grown as much as it needs to, it attaches itself to a leaf to get ready for its next stage of life.
Stage 3: Pupa
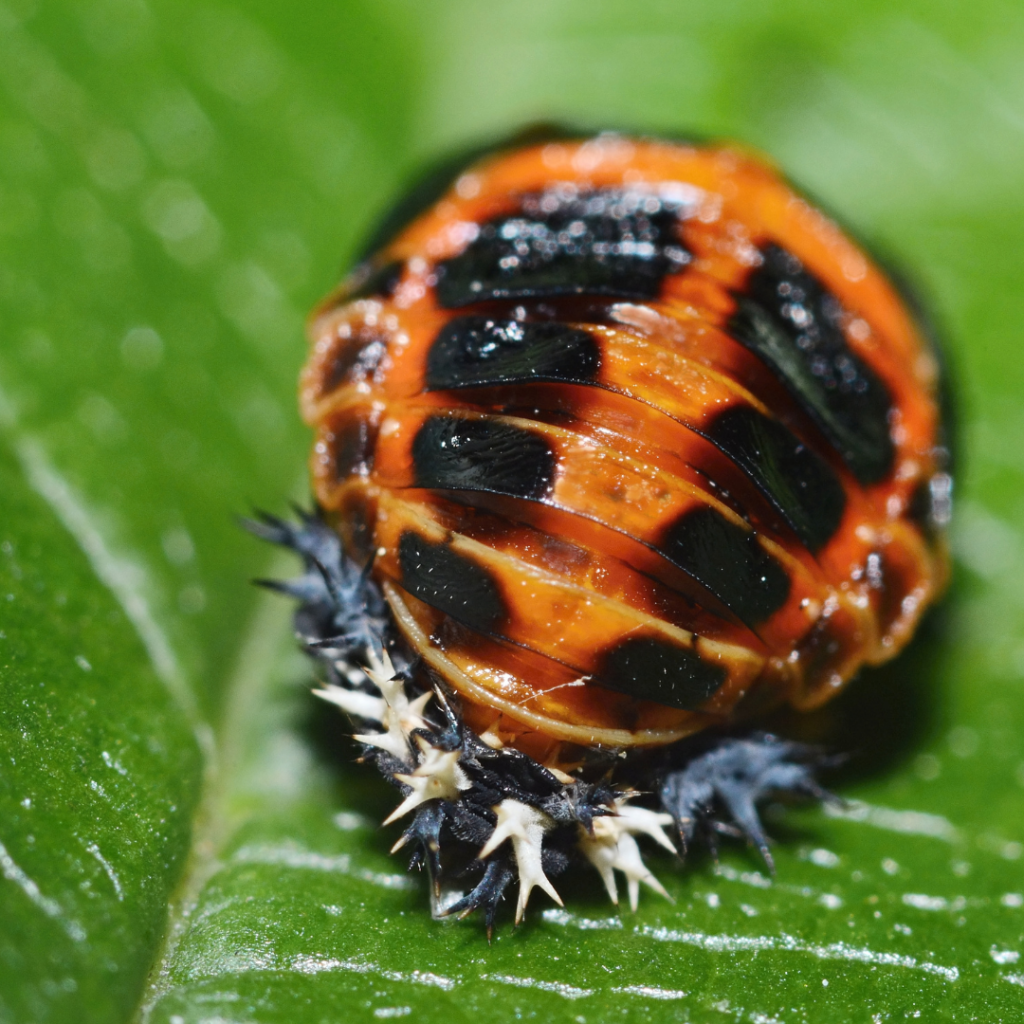
The larva attached to the leaf is now a pupa. It will stay attached to that leaf while it changes into an adult. The pupa does not eat or move because it stored up plenty of food in its body while it was a larva. After about five days, the pupa has changed in incredible ways and is ready to ‘hatch’ again as an adult ladybug!
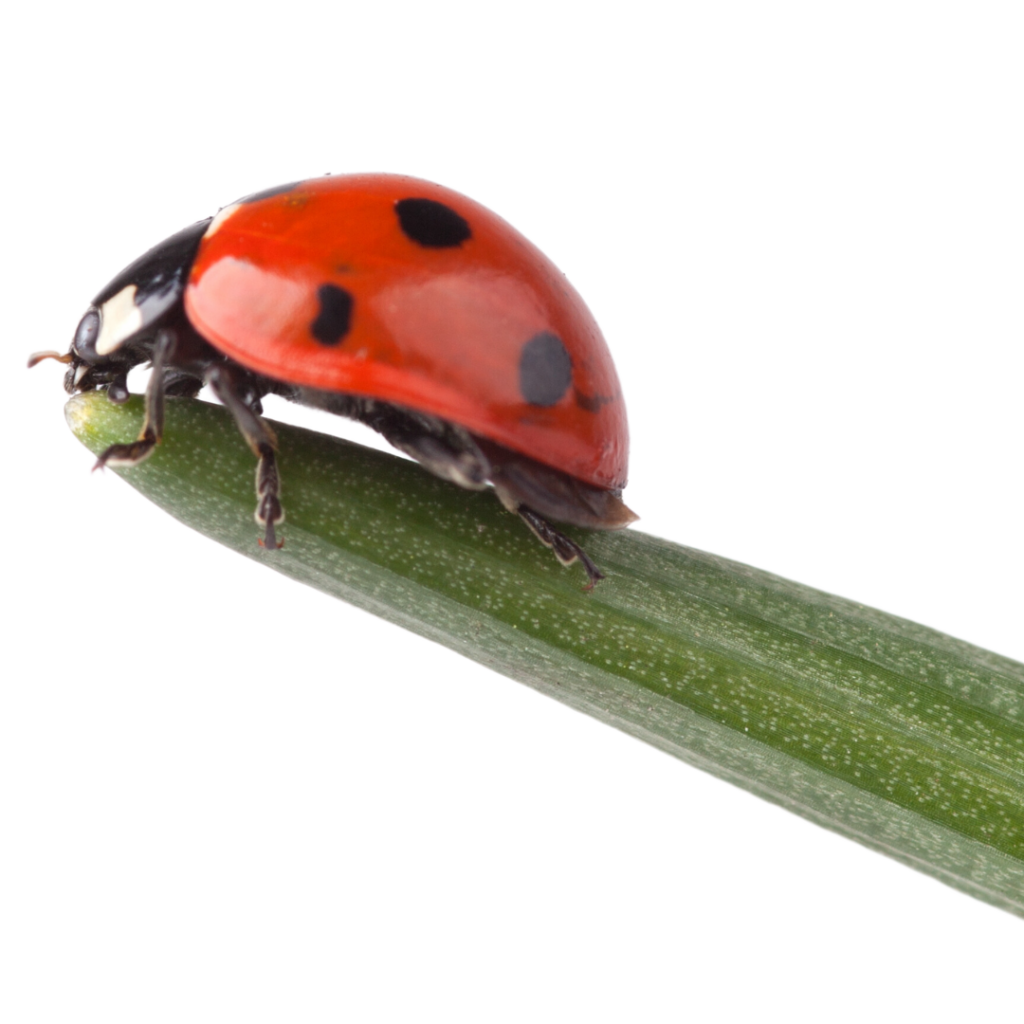
Stage 4: Adult
Now the ladybug emerges from its pupa as a pretty adult ladybug! These are the kind of ladybugs we are used to seeing.
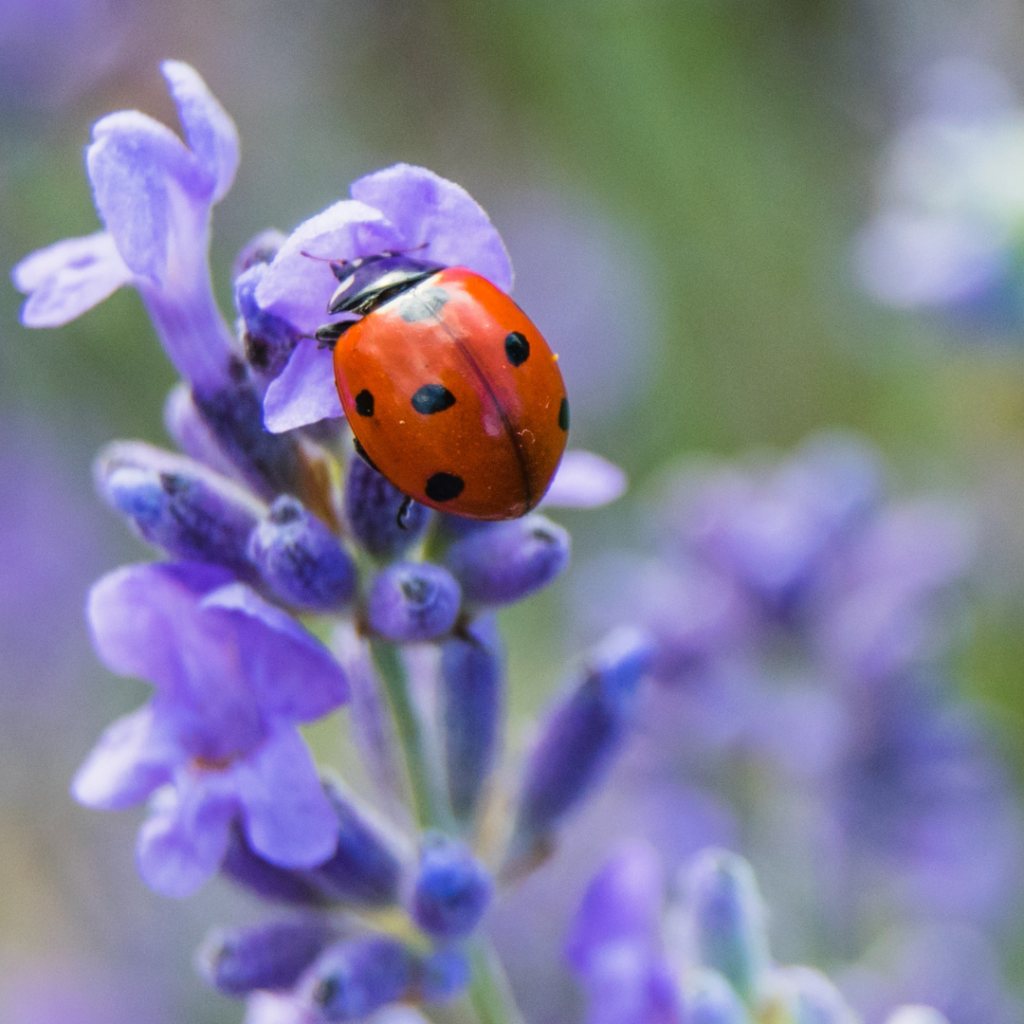
It now has two sets of wings. One set of wings is the hard brightly-colored part that helps us recognize ladybugs. This hard set of wings is called the elytra (say: EL-LIE-TRA) and it protects the fragile flying wings underneath.
The ladybug has an oval-shaped body, six legs, two antennae, a head with two eyes, a thorax that is called a pronotum, and an abdomen (the part of the body that is covered by the elytra).
When the pupa hatches as a new adult ladybug, it doesn’t have any spots yet and its elytra are wet, soft, and pale colored. They will dry out during the ladybug’s first day as an adult and it will soon be a pretty bright color with black spots!
Ladybugs can actually be red, orange, or yellow! Some kinds can even be gray, brown, or all black, but they are less common, and it’s hard to tell they are really ladybugs since their spots are harder to see.
Scientists have counted over 5,000 different kinds of ladybugs in the world! Each of these different kinds has special characteristics, such as color, number of spots, and the shape and size of it’s body.
As an adult, the new ladybugs can eat up to 75 aphids a day. Towards the end of the summer, ladybugs like to eat pollen and some types of plants so that they can store up fat for the winter.
During the winter, ladybugs hibernate. To stay warm, they usually huddle together in groups and bury themselves under piles of leaves, grasses, or rocks for protection from winter weather. When spring arrives, the ladybugs will begin to wake up and come out looking for a tasty meal of aphids! They will begin to lay eggs that will grow into more ladybugs.
To allow kids to see ladybugs change from larva to pupa to adult, we highly recommend the Ladybug Land kit!
Also see Activity 1 in ‘Ladybug Fun’ for tips on finding and raising your own larvae.
Printable Worksheet
Use this Ladybug Life Cycle chart worksheet to review the stages of a ladybug’s life cycle.
Print out both pages and let kids color the pictures, then cut and paste them into the correct spots and label each stage.

Ways Ladybugs Protect Themselves
- Their bright colors warn birds that they are not good to eat. Most birds know that red or orange colored things usually taste bad and might even be poisonous. Ladybugs aren’t poisonous, but birds don’t know that!
- They can leave a trail of fluid that comes out of joints in their legs. The fluid is usually yellow-colored and it smells very bad! Most animals don’t want to eat something that smells rotten, so this is a good way for ladybugs to protect themselves.
- Ladybugs sometimes ‘play dead’ by sitting very still when they think they are in danger. Ladybugs can tuck their head under their thorax and they can tuck their legs under their bodies, which also helps them look dead. A lot of predators will not try to eat something that doesn’t move, so this can be a good defense, but sometimes the predator won’t care if the ladybug is moving or not and might try to eat it anyway!
- When ladybugs are in the larva stage, they look fierce and mean; nothing like the cute little adult ladybugs we are used to! This helps them protect themselves. Larvae also have very strong jaws and can bite other insects.
Ladybug Science Projects
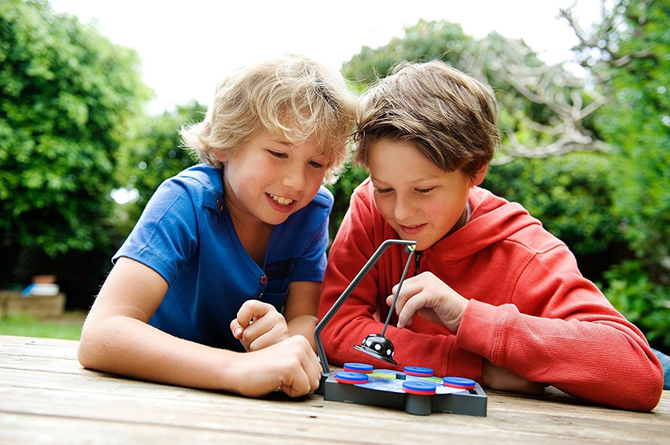
A Ladybug Investigation
The best way to learn about something is to watch it. Scientists do a lot of watching, or observing, to learn about things, especially insects like ladybugs.
In this project, you will get to look for ladybugs and then watch them to learn about them, just like a real scientist! Make sure you get permission from an adult before you start this project.
What You Need:
- a clean jar or clear container with a lid
- a hammer
- a small nail
- a wet cotton ball
- a paper cup
- a magnifying glass
- a notebook
- a pencil
What You Do:
- Get your jar ready to hold ladybugs: ask an adult to help you use the hammer and nail to make small air holes in the lid. Put a wet cotton ball in the bottom of the jar so the ladybugs will have water to drink. Now you’re ready to start your ladybug search.
- Go outside in your backyard or to a park that has a lot of trees and plants.
- Start walking slowly and looking very carefully around trees, bushes, flowers, and in the grass for ladybugs. If you spot one, write down where you found it (examples: on a flower stem or in the grass), what color it is (bright red? orange? dark red?), and how many spots it has.
- If you want to, catch the ladybug in your jar. See if you can get the ladybug to crawl onto your hand and then into the jar. Put a few leaves or parts of the plants the ladybug was on into the jar with it.
- Look very closely at the plants the ladybug was near. Do you see any smaller bugs that the ladybug might have been eating? They will probably blend in with the leaves very well, so look closely!
- Keep searching for more ladybugs by looking under leaves, rocks, in tall grass, and on the bark of trees.
- When you find one, watch it for as long as you can. Stay a few feet away so you won’t scare it. When you’re done watching it, use your paper cup to scoop the ladybug up and put it in your jar.
- Write notes or draw pictures for each ladybug that you find. This is called gathering data. This is like collecting clues to learn more about ladybugs and will help you answer the questions at the end.
- When you have a couple ladybugs in your jar, take a closer look at them with your magnifying glass. Draw pictures of what they look like from different angles (underneath, from above, or from the side) and write down things that you think might be helpful “clues” for learning more about the life of a ladybug.
- If you don’t find any ladybugs, pick a different area to explore (try to find a rosebush or a field with lots of tall grasses). You can also observe other bugs you find. Once you’re finished observing, answer the questions below to see what you have learned!
Questions:
- Where did you find the most ladybugs? Were they on leaves, on tree bark, in the grass, on flowers, or somewhere else?
- Were they in groups or by themselves?
- Based on where you found your ladybugs, what kind of home do you think a ladybug would like? Describe it or draw a picture of it.
- Did you see any ladybugs eating? What were they eating?
- What can ladybugs do to protect themselves? Do they have places to hide?
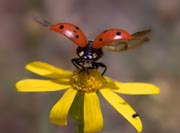
- Do ladybugs have wings? Can they fly? How far do you think they can fly?
- Do all of your ladybugs have the same number of spots? What do you think their spots are for?
- What color are your ladybugs? Why is that a good color for them?
- How many legs do they have? Do you notice anything special about their legs?
- What do their heads look like? Do they have eyes? Do they have antennae?
 If you want to keep your ladybugs for a couple days to watch them some more, you will need to give them something to eat. Soak two raisins in water for 15 minutes. Cut the raisins in half, then put them in the bottom of the ladybug jar. Even though your ladybugs have food and water now, they will still be happier in their natural home. After observing them for 2 or 3 days, make sure you let them go in the place where you found them so they can get back to their normal life of hunting aphids and laying eggs to make more ladybugs!
Ladybug Fun
Here are several fun ladybug activities you can do this summer!
Activity 1: Find Ladybug Larvae
A ladybug larva is a baby ladybug.
Ladybugs go through different stages, and for most of their lives they don’t even look like the pretty red and black ones we are used to seeing!
Your parent or teacher can tell you more about the different stages of a ladybug’s life cycle. Try to find ladybug larvae (that means more than one, larva means one) by looking in the same types of places as you did in the Ladybug Investigation project.
A great place to find ladybug larvae is on a rose bush. Aphids love to eat rose plants and since ladybugs love to eat aphids, many ladybugs will lay their eggs on the leaves of rose bushes so that when the larvae hatch out of the eggs, they will have plenty of food waiting for them!
If you can find some larvae and some aphids, you can collect them in a container and watch the ladybug larvae change into adult ladybugs!
Just be sure to provide them with plenty of aphids and other small insects to eat. They will also need air holes and water. Put a wet cotton ball or paper towel in the bottom of the container to give them water.
Note: Instead of using a jar, a Pop-Up Insect Habitat also makes a great home for your insects!
Activity 2: Make Ladybug Prints
You’ll need a potato (cut in half), paint in ladybug colors (red, orange, or yellow), a paper plate, art paper, a black marker, and a black ink pad.
Put some of the paint on the paper plate and dip the round, cut end of one half of the potato into the paint, then press it firmly onto your paper like a stamp to make a ladybug’s body.
Stamp as many ladybugs onto your paper as you want. Once the paint dries, you can finish your picture by using your thumbprint in the black ink to make a head and your pinky finger to make spots.
Use the marker to give your ladybugs wings, legs, and antennae. You might want to use other paints or markers to draw leaves, aphids, and larvae on your picture also.
Activity 3: Act Like A Ladybug
Make antennae like a ladybug’s by attaching two black pipe-cleaners to a headband (or you can make a headband by attaching pieces of string to a strip of cardboard and tying the string behind your head).
Stick a small Styrofoam ball onto the end of each pipe-cleaner. Paint the balls and the headband black.
Once it is dry, put the antennae on and imagine what it would be like to only be able to feel and smell through your feet and those antennae, the way a ladybug does!
Can you think of anything else you could do like a ladybug?
Activity 4: How Much Do You Know?
Write your own science book about ladybugs!
Include everything you know about them. One way to do it is to make one page for each thing you know about ladybugs, and then either draw pictures for each page, or find pictures that you can cut out of magazines or print from the internet.
Make sure you get permission before cutting anything up or searching on the internet!
Another idea is to ask an adult to help you take pictures of real ladybugs that you find. When you have all the pages ready, make a nice cover for your book, and punch holes in the same places in all of the pages, then use string to tie them together, or put them in a three-ring binder.
You can use this book to share what you have learned about ladybugs with your siblings and friends.