Did you know you can make your own slime or “goop” for a fun learning and play activity? Non-Newtonian liquids are fascinating for all ages and provide a great learning opportunity about chemistry.
Find four popular slime recipes below! With these easy-to-do recipes, kids can learn about valuable scientific principles while they create, play with, and explore four different kinds of slime.
Our hands-on Slime Science Kit for Kids is complete with lab-quality chemicals, containers, and instructions for making the first two types of slime listed below – simple slime (putty-like texture) and super slime (clear & gooey). To make glooze (slimy & ooze-like) and oobleck (resembles quicksand), simply add kitchen staples, like corn starch, skim milk, vinegar, and baking soda!

Simple Slime Recipe
This version of slime (or Gak) is made of glue and Borax.
What You Need:
- School glue
- Borax (Sodium tetraborate)
- Food coloring (optional)
- Water
- Two bowls
What You Do:
1. In one bowl mix 1 oz. glue (about ¼ of the glue bottle) and ¼ cup water. If you want colored slime, add food coloring to the glue and water mixture. Lift some of the solution out of the container with the stir stick and note what happens.
2. Add ¼ cup of liquid Sodium Tetraborate (Borax) Solution (see the recipe below) to the glue and water mixture and stir slowly.
3. The slime will begin to form immediately. Lift some of the solution with the stir stick and observe how the consistency has changed from Step 1.
4. Stir as much as you can, then dig in and knead it with your hands until it gets less sticky. This is a messy experience but is necessary because it
allows the two compounds to bond completely. Don’t worry about any
leftover water in the bowl; just pour it out.
5. When not in use, store the slime in a plastic bag in the fridge to keep it
from growing mold.
What Happened:
The glue has an ingredient called polyvinyl acetate, which is a liquid polymer. The borax links the polyvinyl acetate molecules to each other, creating one large, flexible polymer. This kind of slime will get stiffer and more like putty the more you play with it.
Experiment with different glues to see if they create slime (e.g., carpenter glue, tacky glue, etc.).
You can also make Super Slime Bubbles using most of the same ingredients.
Download the free printable to make Simple Slime.
Super Slime
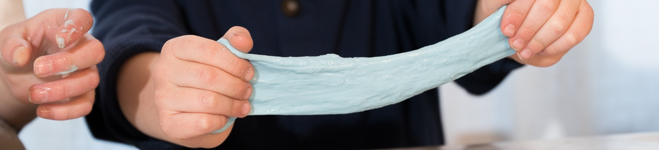
The second type of slime is the same clear gooey kind that you see in the
movies. This is the real gooey deal! (This slime is non-toxic, but still keep these chemicals away from unsupervised children and wash your hands after playing with the slime.)

What You Need:
- Polyvinyl alcohol (PVA) solution
- Borax (Sodium tetraborate)
- Beaker or jar
- Food coloring (optional)
What You Do:
1. Pour ½ cup of the polyvinyl alcohol (PVA) solution into a beaker, jar, or bowl. If you want colored slime, add food coloring to the PVA solution and stir with a stir stick.
2. Add 2 teaspoons of the Sodium Tetraborate (Borax) Solution (see the recipe below) into the PVA solution
and stir slowly.
3. Try lifting some of the solution with the stir stick and note what happens.
Once the slime has formed, you can play with it. Just don’t eat it!
4. Your slime will last longer if you seal it in a plastic bag and keep it in the
fridge, otherwise it will dry out or mold.
What Happened:
Polyvinyl alcohol (PVA) is a liquid polymer and is therefore formed from long chains of connected molecules.
The sodium tetraborate forms hydrogen bonds with oxygen present in the PVA chains. Hydrogen bonds occur when the positive charge of the hydrogen atoms attracts the negative charge of the oxygen atoms within the compound.
The hydrogen bonds link the individual PVA strands to each other, creating a “blob” of slime.
Since hydrogen bonds are weak, they will break and reform as you hold the slime or let it ooze onto a flat surface.
Download the free printable to make Super Slime.
Glooze
This slimy substance is made from milk.
What You Need:
- Skim milk
- Vinegar
- Baking soda
- A coffee filter
What You Do:
1. Add 7 tablespoons of skim milk to a cup and add 1 tablespoon of vinegar
to the milk. Gently stir the mixture until solids have formed.
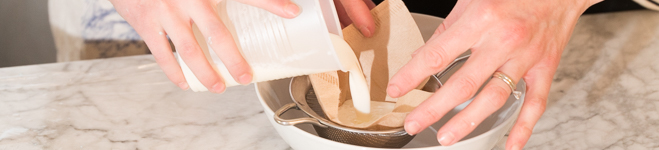
2. Let the solids sink to the bottom of the mixture and then drain off the
liquid using a filter (a coffee filter works best). Let the solids drain for a few minutes.
3. Add ¼ teaspoon of baking soda to the solids and knead together to form a slimy mixture from milk.
What Happened:
When you added the vinegar to the milk, it caused the milk’s protein, casein, which is also a polymer, to separate from the liquid part of the milk and clump together to form solids.
Casein is used in adhesives, paints, and even plastics.
The baking soda neutralizes the acid added, which allows the casein to go back to its liquid form.
Download the free printable for the Glooze recipe.
Oobleck or Quicksand
Make a non-Newtonian fluid that resembles quicksand using cornstarch.
What You Need:
- Cornstarch
- Water
- A big bowl
What You Do:
1. In the plastic mixing bowl, combine small amounts of water and cornstarch together to form a mixture that looks like heavy whipping cream and has the consistency of honey. The approximate ratio of the cornstarch to water mixture is 2 cups of cornstarch to 1 cup of water. So if you use all of a regular-sized box of cornstarch (about 16 oz.), you will use about 1½ cups of water. It is best to start with less water and slowly add it until the desired consistency is reached.
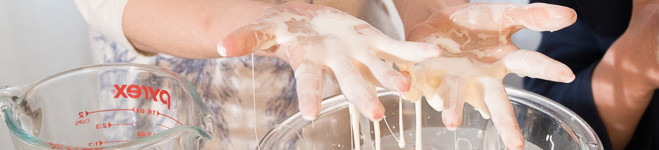
2. After making your mixture, gently lay your hand on the surface of the cornstarch-water mixture. You should notice that your hand sinks in the mixture like you would expect it to do. Move your hand through the mixture, slowly first and then trying to move it really fast. Was it easier to move your hand slowly or quickly through it?
3. If your mixture is deep enough to submerge your entire hand in it, try grabbing a handful of the mixture and pulling your hand out quickly. Then try again, this time relaxing your hand and pulling it out slowly. Did you notice a difference?
4. Try punching the cornstarch-water mixture. (Be careful not to hurt yourself on the bowl!) Make sure to hit the substance hard and pull your fist back quickly. Did the substance splatter everywhere or did it remain in the bowl? (If it splattered, add more cornstarch.)
Whenever you gently and slowly move your hand through the cornstarch-water mixture, it behaves like a liquid. But when you try to move your hand through it quickly or forcefully hit the substance, it behaves like a solid. This cornstarch-water mixture behaves similarly to quicksand.
What Happened:
The flow and movement of a fluid are affected by its viscosity, or how sticky and thick it is.
Quicksand and the cornstarch-water mixture are both non-Newtonian fluids. Non-Newtonian viscosity changes with the type of force applied to it.
The viscosity of Newtonian fluids (such as water and honey, which follow Sir Isaac Newton’s law of viscosity) is dependent only on the temperature and pressure of the fluid, not the force applied to it. For instance, warm honey (less viscous) flows much more freely than cold honey (more viscous).
Since the ability of a non-Newtonian fluid to move depends on the force or stress applied to it, these fluids do not act like ones we are more familiar with (e.g., honey or water). A light pressure, such as pouring or gently pressing the cornstarch-water mixture, allows it to move like a liquid.
Download the free printable with the Oobleck recipe.
Other fun home recipes:
Use glue and borax to make a colorful bouncy ball
Sodium Tetraborate (Borax) Solution Recipe
1. Label an 8 oz. plastic bottle “Sodium Tetraborate (Borax) Solution” with a permanent marker.
2. Fill the bottle about ¾ full with water.
3. Add 4 teaspoons of sodium tetraborate to the water and shake until mostly dissolved.
4. Fill the bottle to the top with water and shake again to completely dissolve the sodium tetraborate solids.
More Information about non-Newtonian Liquid
A non-Newtonian liquid is a substance that acts like a liquid in some situations but as a solid in others. Quicksand is an example of a non-Newtonian liquid. It appears to be solid, but if you stand on it, you slowly start sinking as if it were a liquid.
Polymers are what make non-Newtonian liquids unique. A polymer is a long string of molecules that can exist as a liquid or a solid.
The term polymer comes from the Greek words for “many parts.” Liquid polymers act as a liquid until particular chemicals are added, which create links between the molecules.
These links transform the compound into a hybrid between liquid and solid. Since the molecules are now connected, they cannot move as freely, which gives them the strange properties found in slime.
The new compound is called a non-Newtonian liquid.