Easy Option:
This project demonstrates that the Earth is rotating, in relation to the sun, by showing how a shadow moves throughout the day. Kids will see that by marking the places the shadow moves, they can create their own sundial to tell time outside. Read the lesson on How We Tell Time Using the Sun for more information.
What You Need:
- Stiff piece of cardboard, file folder, tablet back, or other flat, durable surface to make marks on
- Pencil or Chalk
- Ruler or yardstick
- Colored drinking straw, or other long, narrow object
- Clay, tape, or other adhesive to adhere the object to the flat surface
- Masking tape
- Small scissors (Have an adult supervise the use of any sharp objects!)
- Marker, pen, or pencil
- Magnetic compass
- Watch or clock
- Timer, alarm, or stopwatch to alert you at one-hour intervals
What You Do:
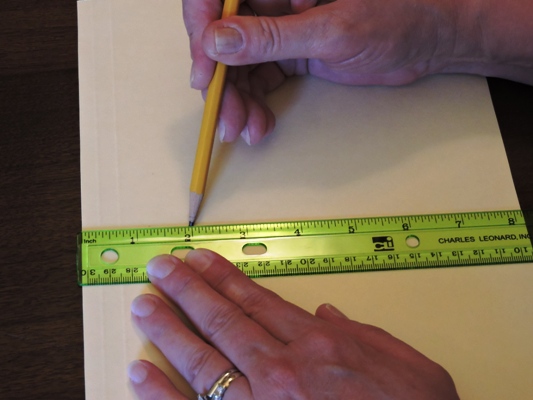
1. Choose one of the long sides of your cardboard to be the bottom. Two inches from the bottom, make a pencil mark in the center.
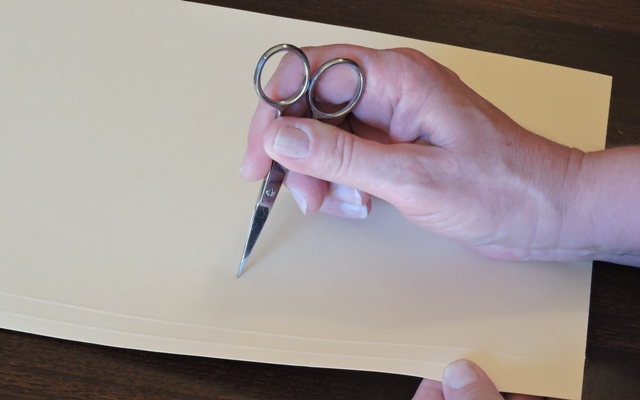
2. Use a pencil, small scissors, or other sharp object to make a small hole the same size, or slightly smaller than, the straw.
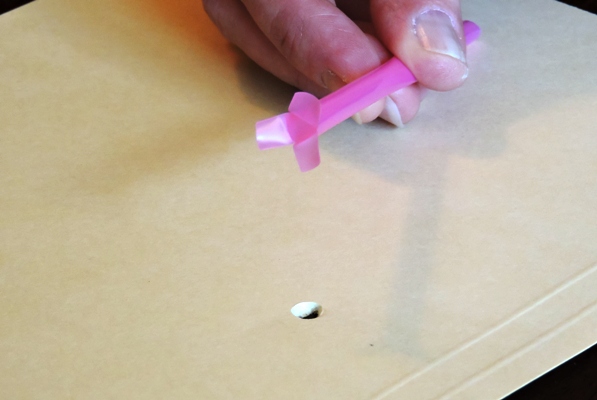
3. Use the scissors to cut the straw: make three vertical, equal, half-inch cuts from the bottom of the straw so that you can spread the sections out flat, for the straw to stand on. If you’re using a pencil or other heavier object, skip this step.
4. Insert the top of the straw through the hole in the cardboard until just the cut sections remain on the bottom of the cardboard.
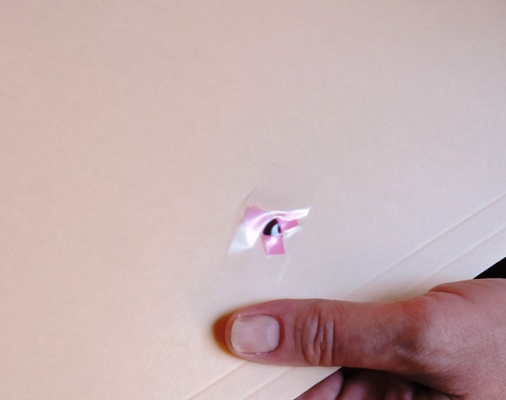
5. Tape the cut sections securely to the bottom of the cardboard. If you’re using a pencil or other heavier object, use clay on the top of the cardboard (instead of tape on the bottom) to hold your object upright.
6. Now your straw should be standing upright when you place the cardboard on the ground or table.
7. Find a place where the sun shines all day and you can leave the sundial in the same position. Options include your driveway, the sidewalk, your patio or other hard, flat surface.
.jpg)
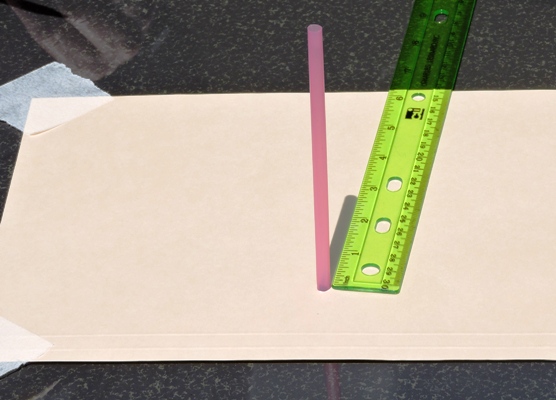
8. Find North. Use a compass to find North. Position the cardboard so that the shadow of the straw aligns with North on the compass. Use the masking tape to secure the cardboard to the ground or table.
9. Set your alarm for the next top of the hour (noon, 1:00, 2:00, etc.)
When the alarm sounds, observe where the straw’s shadow is on the cardboard. Align the ruler with the edge of the straw’s shadow and make a pencil mark along the edge of the ruler.
10. Write the hour next to, on top of, or underneath, the mark.
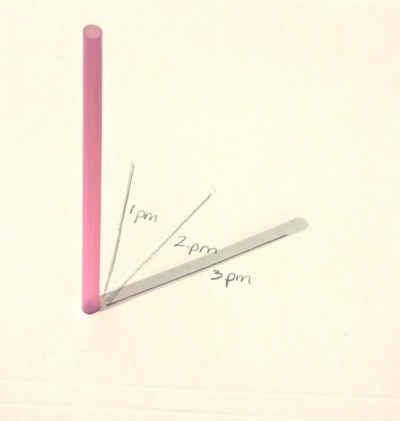
11. Repeat the observation and notes at each hour. If you started in the afternoon, come back to the sundial the next day in the morning hours to complete the hour marks.
What Happened:
As the day went by, the Earth spun on its axis, so the rays from the sun reached your sundial from different angles, making the straw cast a shadow in different places. By marking the shadow at equal segments of time, and assigning a number to each segment, you’ve made your first sundial!
This sundial is accurate for your location and time of year. When the Earth moves around the sun and the sun’s rays reach you differently, this sundial won’t be accurate.
Easier Option: Make Yourself the Sundial!
The object that casts the shadow is called a gnomon (pronounce it: the g is silent and it rhymes with Roman). Instead of using another object for the gnomon, use yourself!
What You Need:
- A large, open concrete space, such as a driveway, sidewalk or patio where the sun shines all day and you can leave your chalk marks.
- Chalk
- Magnetic Compass
- Timer, alarm, or stopwatch to alert you at one-hour intervals
What You Do:
1. Find North. Use a [compass] or map to help you find North.
2. Stand so that you have open concrete to both sides and in front of you.
3. Have someone draw around your feet so you know where to stand and can come back to stand in the same place each hour.
4. Hold one arm up straight above your head, so that your arm is touching your ear.
5. Have the other person make a mark with chalk on the concrete along the line of your arm’s shadow. Write the time next to, or underneath the mark.
6. Set your alarm for the next top of the hour (noon, 1:00, 2:00, etc.)
7. When the alarm sounds, go stand in the chalk feet outline and put your arm up straight in the same position as the last time.
8. Have someone make a chalk line along the shadow your arm makes. Make sure to use the same side of the shadow each time.
9. Write the hour next to, or underneath, the mark.
10. Repeat the observation, chalk mark and hour note, each hour. If you started in the afternoon, come back to the sundial the next day in the morning hours to complete the hour marks.
What Happened
As the day went by, the Earth spun on its axis, so the rays from the sun reached your sundial from different angles, making your arm cast a shadow in different places. By marking the shadow at equal segments of time, and assigning a number to each segment, you’ve made your first clock!
This sundial is accurate for your location and time of year. When the Earth moves around the sun and the sun’s rays reach you differently, the sundial won’t be accurate.