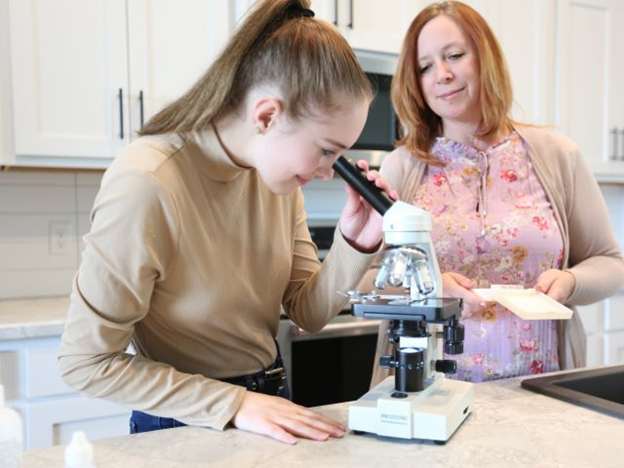
There are two basic types of microscopes: compound and stereo. Stereo microscopes use lower power than compound microscopes do and have typical magnification levels ranging from about 10 to 40x. These microscopes are very versatile and are designed for viewing whole objects such as rocks, insects, and flowers. But they can also be used for viewing prepared slides. They are a helpful tool for nature studies and are ideal for young children.
Find out more in this Science Lesson:
Diagram of Parts
Steps in Using a Stereo Microscope
Ideas for Using a Stereo Microscope
Adjusting Interpupillary Distance
Adjusting Diopter
Cleaning and Maintenance
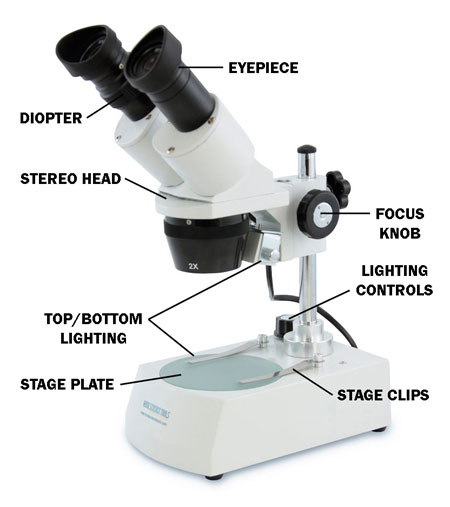
Diagram of Parts
The diagram below shows where each part is located on a typical stereo microscope:
Steps in Using a Stereo Microscope
- Set your microscope on a tabletop or other flat sturdy surface where you will have plenty of room to work. Plug the microscope’s power cord into an outlet. Make sure that the excess cord is out of the way so no one can trip over it or pull it off of the table.
- Switch on the light source(s). If you will be looking at a microscope slide or other transparent object, bottom lighting will work best. If the specimen you are viewing is opaque or solid (light cannot pass through it from below). Use top lighting so that the light can reflect off the specimen’s surface.
- Center your specimen on the stage plate. If your specimen is thin and flat, or if its edges curl up easily, try using the stage clips to hold it in place. To do this, pull up the pointed end of one stage clip and slide it over one end of the specimen, then do the same with the stage clip on the other side. If your specimen is larger than the stage plate, you might need to turn the stage clips out so that they are hanging off the stage giving you more room to work.
- Adjust the eyepiece(s) so that you can look through the microscope comfortably without straining your eyes. (See below for instructions on adjusting a stereo head). For light-colored translucent specimens such as salt crystals, use either the black side of the stage plate (if it is reversible) or a piece of dark-colored construction paper to provide contrast.
- If your stereo microscope has a rotating objective turret, turn it so that the marking on the objective you want to use is facing the front of the microscope. To determine the magnification of your microscope, multiply the magnification level of the eyepiece lens by that of the objective lens. For example, on the microscope in the diagram above, the total magnification at the 2x objective is 20x (2 x 10 = 20).
- While looking through the eyepiece(s), slowly turn the focus knob until the specimen comes into view. Once you can see the outline of the specimen, turn even more slowly to focus as sharply as possible. If you aren’t able to see anything, try moving the specimen around slightly on the stage plate to make sure it is directly below the objective lens and then try focusing again. Once you have focused on the specimen, you can move it around to see its other parts. You may have to refocus slightly on each new area. Note: with a stereo microscope you will often be viewing three-dimensional specimens that have many different levels. You will not be able to focus every feature clearly at the same time.
- When you are finished using your microscope, turn off the switch, remove the specimen, unplug the power cord, and cover the microscope with its dust cover. Store your microscope in a place where it will not be damaged from extreme hot or cold temperatures, and out of the reach of small children.
Ideas for Using a Stereo Microscope
Clear plastic or glass petri dishes are great for viewing live or messy objects with a stereo microscope because they fit well on the stage and keep everything adequately contained. The suggestions below are just a few things you can use petri dishes to view with your stereo microscope. Place the item or items to be viewed in the bottom of a petri dish and position it on the stage plate of your microscope. Use top or bottom lighting.
- Observe the habits of live insects.
Collect insects in the bottom of a petri dish and cover with its lid to keep insects from escaping. Be careful not to leave the light source shining on the insects for too long as the heat could eventually kill them.
- Study a shallow dish of pond water, daphnia, or brine shrimp.
Watch them closely as these tiny creatures swim, dive, and eat.
- Examine a soil sample to see the different materials that comprise it.
Soils with a lot of sand or clay are particularly interesting to look at. You might even want to collect soil samples from several different spots and compare and contrast what you see in each sample.
- Make a simple prepared slide of sand, hair, thread, salt, or something else by sticking it to a piece of clear tape and viewing it specimen side up.
See our Science Lesson on Making Simple Microscope Slides for detailed instructions about how to do this.
- Dissect a flower to learn about the beauty and intricacies of all its parts.
Carefully pull the flower petals and inside parts off of the stem trying not to damage or tear them. See if you can identify the parts using a flower identification book. Stick one or two of the parts on your microscope to get a closer look. If there was a lot of pollen on the flower, try putting the pollinated parts, or loose pollen, into a petri dish and check it out with your microscope. (Note: This is not a good activity to do if you have bad allergies!)
- Compare the types of minerals and crystals in different rock specimens.
You can break off small pieces of larger rocks by knocking them together or using a rock pick. Put any small shards or pieces of the broken rocks into a petri dish for easy viewing.
Print out copies of our Stereo Microscope Observation Worksheet to help you record the data from these studies!
Adjusting Interpupillary Distance
Interpupillary distance, the distance between the pupils of your eyes, varies from person to person. Each observer should make this adjustment before using a binocular microscope or stereo head microscope for the greatest viewing comfort and best image quality. Focus your eyes on the specimen, and only use your peripheral vision as you proceed. Now pull your eyes back from the eyepieces about 1′. You will see two field views overlapping each other. Open or close the distance between the eyepieces by pulling them apart or pushing them together until the two circles merge together and appear as one circle. The interpupillary distance is set correctly when you see just one field view circle.
Adjusting Diopter
A diopter is used to make up for focusing differences between your eyes. This adjustment will also vary from person to person. Start by holding your hand over the eye that is in front of the eyepiece with the diopter (the eyepiece with the knurled band around it). Bring a specimen into sharp focus. Now cover the other eye (the eye in front of the eyepiece without the diopter) and bring the specimen into sharp focus by rotating the diopter adjustment. Do not use the focus knob for this last step–only the diopter adjustment.
Cleaning and Maintenance
To clean the exterior side of lenses, use a non-solvent cleaning solution designed for cleaning optics or eyeglasses. First, remove dust with a soft brush or can of compressed air. Then moisten a piece of dry lint-free tissue or lens paper and clean the lens surfaces with a circular motion. Repeat with a second piece of paper moistened with lens solution if necessary. Repeat once again with dry lens paper until the lens is clean and dry. Use this same procedure for the eyepiece and objective lenses.
To clean the interior side of lenses, use a bulb-type duster or a compressed gas canister designed for cameras and other optical equipment. Do not use the above procedure.
To clean the body of the microscope, use a soft dry or damp cloth. Using a dust cover will help keep your microscope investment clean and dust-free.