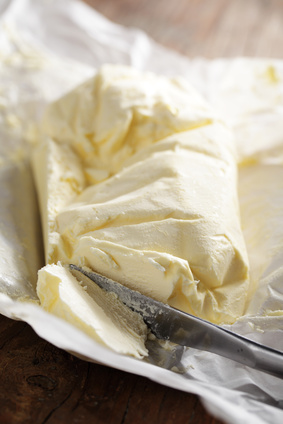
Homemade Butter
What You Need:
- Whipping cream (at room temperature)
- Small glass jar, like what jam comes in
What You Do:
1. Make sure the whipping cream you’re using is at room temperature (not cold from the refrigerator).
2. Put a half cup of the cream into the jar. Put the lid on, and start shaking the jar. You can try rolling the jar back and forth with a family member, or take turns shaking the jar.
3. Eventually, the cream will form into a ball. When this happens, you can pour off the excess liquid and then add a sprinkling of salt to your homemade butter.
What Happened:
Whipping cream is a dairy product that contains a lot of milk fat—usually around 30% or more. Cream comes from skimming off the top of fresh milk, where most of the milk fat has risen. The fat from the cream is contained in tiny droplets, like mini balloons too small to see without a microscope. When you shake the jar, these balloons break open, letting the bits of fat go free. All the fat is collected together the more you shake it, creating an emulsion, or a mixture of two immiscible (not mixable) substances wherein one substance is immersed into the other. Eventually all the fat comes together and forms butter. Once the butter is made, there will still be extra liquid in the jar. This is the leftover part of the cream, once the fat has been taken out. It might taste a bit like milk, which has a lot less fat in it than cream does.
| Featured Kit Cheesemaking Kit  In less than an hour, you can make fresh ricotta and mozzarella using the ingredients in this kit plus milk or cream.Experiment with different recipes, too, using cow or goat milk. You’ll get enough rennet (the enzyme that creates curds), citric acid, and cheese salt to make 30 batches of cheese. In less than an hour, you can make fresh ricotta and mozzarella using the ingredients in this kit plus milk or cream.Experiment with different recipes, too, using cow or goat milk. You’ll get enough rennet (the enzyme that creates curds), citric acid, and cheese salt to make 30 batches of cheese.
The instructions explain cheesemaking and include tasty recipes for making lasagna, pizza, and more with your homemade cheese! |
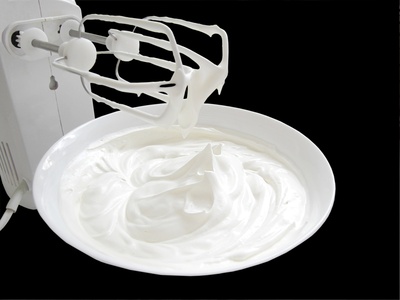
Homemade Whipped Cream
What You Need:
- Whipping cream (very cold)
- Large metal mixing bowl
- Wire whisk or electric mixer
What You Do:
1. Pour a half cup of heavy whipping cream into the mixing bowl
2. Using your wire whisk or electric mixer, whip the cream. After several minutes, it should begin to stiffen.
3. Continue whisking until it’s reached the desired consistency.
What Happened:
When you whip cream, you’re introducing millions of tiny air bubbles into the liquid. First the cream gets foamy, but as you continue whipping, you strip away the protective outer membranes on the fat balloons. This allows the fat to join together and gradually form protective bubbles around the tiny pockets of air. Like butter, it’s also an emulsion. In fact, if you whip it long enough, it will turn into butter! Air suspended in liquid and held stable by fat – and is also why you need cream with a relatively high fat content (at least 30%) in order to whip cream. The less fat, the thinner the fat globules are stretched and the harder it is to make a stable emulsion.
Science Links
Learn more about the science behind whipped cream.
Study the science behind butter.
Science Projects
Explore more kitchen science.