Magic show or chemistry lab?
Sometimes it’s hard to tell the difference!
Chemical reactions often produce spectacular color changes that appear to happen just by magic. Now is your chance to put some tricks up your sleeve and wow your friends with scientific sleight of hand.
(NOTE: Some of the chemicals used in these projects can be hazardous if misused. Use caution when working with chemicals! Read the information on the chemical label before you start, and always wear protective lab safety equipment such as goggles, gloves, and aprons. Adult supervision required.)
Check out our top-selling beginner chemistry set and home chemistry kit to perform classic experiments. See our complete introduction to chemistry kit for a full overview of chemistry concepts and experiments.
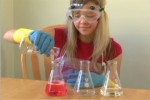
Color Change Chemical Reactions Experiments + Video
#1 – Confounding Color
Can you get a liquid to change color simply by pouring it into another container?
See this experiment in action before you try it!
What You Need:
- Four 250 ml erlenmeyr flasks or 250 ml beakers
- Universal indicator
- Vinegar
- Ammonia
- Pipets
What You Do:
1. Put 25 drops of universal indicator into the first flask, and then add 200ml of water.
2. In the second flask, put a dropper-full of vinegar.
3. Add a dropper-full of ammonia to the third flask. (Be very careful not to breathe in the strong fumes from the ammonia!)
4. Put 100ml of vinegar in the fourth flask.
5. Slowly pour the contents of the first flask into the second one, then the second into the third and the third into the fourth.
What Happened:
The secret of this magic color change is pH. Chemicals with a low pH (0-6) are acidic, while those with a high pH (8-14) are basic. (A pH of 7 is neutral: neither acidic nor basic.) Universal indicator is a chemical that changes color in the presence of acids and bases from a pH of 2 to 10. Acids turn the indicator red, pink, orange, and yellow, while bases turn it green, blue, and purple. Vinegar is an acid, so when you poured the indicator solution into the second flask, it turned red. Ammonia is a base, so when you mixed the acidic vinegar solution with ammonia, it raised the pH and the water turned blue. If you had enough vinegar in your last flask, the solution should have turned red again. (If it didn’t, try adding a little more vinegar.)
#2 – Mystery Pitcher
Can you pour red “kool-aid” out of a pitcher of water? Try it out and impress your audience – just don’t drink the finished product!
Check out our project video to see this trick in action!
>> Get our Chemistry Magic Tricks Kit to do this project and 11 more!
What You Need:
- Phenolphthalein solution
- Sodium carbonate experiment powder
- Vinegar
- 5 glasses and a non-see-through pitcher of water
What You Do:
1. In the first glass put a little less than 1/8 teaspoon of sodium carbonate, in the second put 6 drops of phenolphthalein solution, and in the third put three droppers-full of vinegar.
2. Add a few drops of water to the first glass and stir to dissolve the sodium carbonate.
3. Fill all the glasses with water from the pitcher, then pour all of them back in the pitcher except for the glass with vinegar.
4. Refill the remaining four glasses – the water will be red!
5. Now pour all five glasses back in the pitcher. Refill the glasses one last time — the liquid will be colorless again!
What Happened:
Like the universal indicator, phenolphthalein is a pH indicator, but it only turns colors in reaction to bases. When you poured the four glasses back into the pitcher, the phenolphthalein reacted to the sodium carbonate, a base, and turned the solution to red “kool-aid.” To change it back to “water,” all you had to do was add the acidic vinegar, which turned the phenolphthalein colorless again.
#3 – Invisible Ink
Invisible inks are also called sympathetic inks, and can be made with many different substances. Sometimes they appear when you heat them up; other times another chemical can reveal them. Get creative and see how many kinds of invisible ink you can find.
What You Need:
- You need Ink type 1 – lemon juice, grapefruit juice, vinegar, milk, onion juice
- Plus, Ink type 2 – cobalt chloride solution or cocl2
- Lastly, Ink type 3 – phenolphthalein, Windex
- Q-tips or paintbrush
What You Do:
1. Choose a liquid like lemon juice to use as ink. Write a message on a piece of white paper using a paintbrush or q-tip, dipping in the ink frequently. Let the message dry. Turn on the toaster and carefully hold your paper over it. The heat will make your secret writing appear!
2. Some sympathetic inks appear and disappear again based on humidity. To try one of these, make a solution of 1/8 teaspoon cobalt chloride and 1/2 cup water. After writing your message and letting it dry, heat the paper to see your message appear in blue. Now hold the paper face down over a pan of steaming water. The steam will cause the writing to disappear. If you reheat it (evaporating all the water) the writing will appear again.
3. Other sympathetic inks work because of acid-base reactions. Use phenolphthalein solution to write a message on a piece of paper and let it dry. After it is dry, spray it with some Windex. Since Windex is a base, it will turn the phenolphthalein bright pink.
What other sympathetic inks can you find? Which kind shows up best? Which kind lasts longest?
#4 – Chromatography
Inks and dyes are generally made up of a mixture of different colors. Chromatography is a process that lets you separate ink into its individual colors.
What You Need:
- Filter paper (paper towels or coffee filters will work too, but filter paper is best)
- Black marker or felt-tip pens, highlighters (non-primary colors)
- Food coloring pack
- Several drinking glasses
- Many pencils
What You Do:
1. Cut several strips of filter paper about a half-inch wide. Draw a big dot about a half-inch from the bottom of one of the strips with one of the markers or pens you want to test. Do the same thing on different strips for each pen you want to test.
2. Tape the strip to a pencil so that when the pencil rests across the cup the strip will hang down into the cup.
3. Pour water into each cup until it is just barely touching the bottom of the paper strip. Leave the strip hanging in the water until the color has traveled most of the way up the strip.
What Happened:
As the water creeps up the absorbent paper, it carries the color with it. Some components of the ink travel farther than others, causing the different colors to spread out so you can see them. How many colors do you see? Do the different brands of pens have different colors?
Many dyes are also made up of multiple colors. Try a chromatography experiment with some food coloring. Place a drop of food coloring in some water and hang a filter paper strip so it just barely touches the water. Does it separate into colors? Try mixing more than one color of food coloring and then see if you can separate them again with chromatography.
You can also do chromatography with permanent pens and markers; you’ll just need to use a different solvent, since those inks don’t dissolve in water. Try isopropyl (rubbing) alcohol 90% or nail polish remover.
Get our chromatography kit for all the materials you need for fun chromatography projects.
Annual Color Change Chemical Reaction Experiments
Changing Leaves

Every fall we watch amazing chemistry color changes happen all around us. Trees that were green all year suddenly become bright yellow, orange, red, or even purple! How does this happen?
There are three types of chemical color pigments in green leaves: chlorophyll, carotenoids, and anthocyanins.
Chlorophyll is the dominant green pigment used throughout the summer in the production of food by photosynthesis.
Carotenoids are pigments that give yellow, orange, or brown colors and are present all summer. Anthocyanins cause reds and purples and are produced in the fall.
During the summer months, the leaves are so full of chlorophyll that green overpowers any other colors present in the leaves, such as yellow and orange. Even though carotenoids may be present in the leaves, we can’t see them because the chlorophyll is so strong.
In the fall the days start to get shorter and the temperature drops, signaling to the tree that it is time to go into storage mode for the winter. The chlorophyll starts to break down, causing the green in the leaves to disappear, and allowing us to see the colors of the carotenoids, which were present all along. Most of the sugars and starches produced by the chlorophyll in the leaves are brought back into the tree, but when excess sugar is left in the leaves, anthocyanins are produced. (Bright light also helps to form these red pigments.)
Eventually a separation layer of cells builds up where the leaf is connected to the branch of the tree, blocking the transport of sugars from the leaf to the tree. When this layer is complete, the wind or the weight of the leaves themselves will cause the leaves to fall from the tree. Beneath the tree the layer of fallen leaves decomposes throughout the winter, returning nutrients back to the soil, which makes the topsoil fertile for more plants to grow in the next year.
Explore the pigments inside a green leaf by doing a leaf chromatography experiment! The setup is similar to the chromatography project above, but this time you use rubbing alcohol to help break down the chlorophyll.