Valentine’s Day is a great opportunity to inspire your student’s LOVE for science! Engage your kids with science concepts such as diffusion, density, and surfactants. These three, hands-on Valentine’s Day science projects include the Dancing Conversational Hearts, Rainbow Heart, and Marbled Valentine’s Day card.
Dancing Hearts: Valentine’s Day Science Made Fun
What You Need:
- 1 cup water
- 1 tablespoon baking soda
- ½ cup vinegar
- Beaker
- Conversation hearts
What To Do:
- Mix water and baking soda in the beaker.
- Add the hearts.
- Carefully add the vinegar to the solution.
Science Lesson:
Carbon dioxide gas is created when the vinegar and baking soda reacts. The carbon dioxide gas creates bubbles that attach to the candy and lifts it to the surface of the solution. The carbon dioxide bubbles pop when they reach the surface. Because the hearts are too dense to float, they sink back to the bottom.
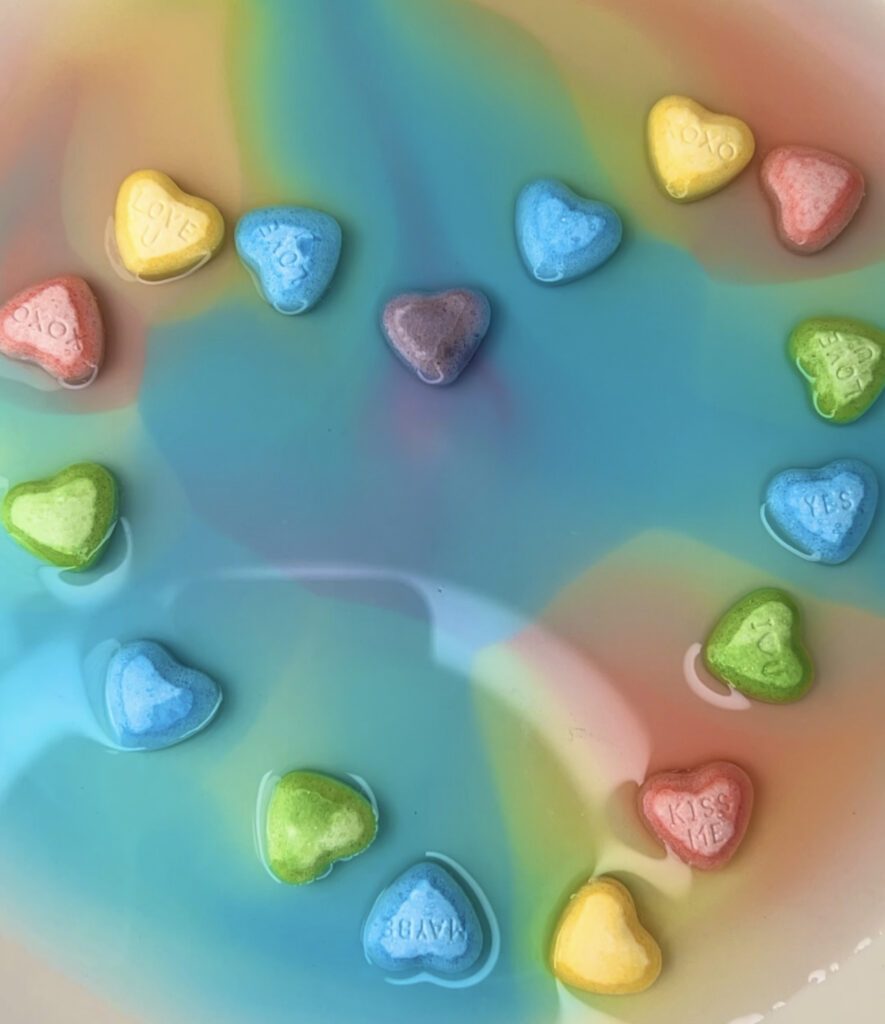
More Valentine’s Day Science Projects: Rainbow Heart
What You Need:
- Conversational Hearts (or other hard candy)
- Plate
- Warm water
What To Do:
- Arrange candy in the shape of a heart on an empty plate
- Then, pour warm water into the middle of the candy heart.
- After that, you will test different candy, shapes, and color patterns
- Experiment with cold water vs. hot water
Science Lesson:
Artificial dyes coat the candy and easily dissolve in water. When you place the candy in water, the dye molecules break away from the surface and spread out into the surrounding water. This process, where molecules move from one area to another, is called diffusion. The molecules in the dye spread away from areas with high concentration to areas with low concentration until the concentration of dye molecules is equal. This is called equilibrium.
Marbled Valentine’s Day Card
What You Need:
- Shaving cream
- Shallow pan or wax paper
- Ruler or spatula
- Food coloring or paint
- Paper
- Water
What To Do:
- Dispense a mound of shaving cream in a shallow pan or on wax paper.
- Then, level it out with a ruler or spatula as best you can.
- Drop food coloring or paint onto the shaving cream and swirl it. Meanwhile, be careful not to mix the colors too much.
- After that, carefully press the paper into the shaving cream, smoothing out bubbles. Leave it on for a minute or so.
- Finally, lift the paper off. Gently rinse under running water and let dry.
Science Lesson:
The shaving cream is made of a mixture of soap and water. Specifically, soap is a surfactant, which means its molecule has a hydrophilic (water loving) and hydrophobic (water repelling) end. Therefore, liquid food coloring, which is hydrophilic, will mix with the water-based part of the shaving cream. When you drop the food coloring on the shaving cream, it won’t get soaked in, as it can only interact with the hydrophilic parts of the soap molecules and is repelled by the hydrophobic parts.
When you put the paper on top of the color pattern, the food dye gets soaked into the paper, transferring the whole pattern onto its surface. This is because paper mainly consists of cellulose found in cell walls of green plant cells: a hydrophilic molecule. The food dye can spread easily across the paper, creating a beautiful marbled pattern.