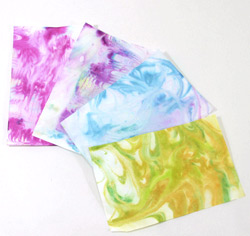
Paper marbling sprawls continents and centuries. Take one look at its stone-like or curlicue effects and it’s easy to see why. A variety of methods produce marbled paper. In this marble paper science project, we’ll explore two different marbling techniques. Once you understand the basics of paper marbling science, experiment to find the method you like best. Then use your marbled paper for cards, gift wrap, or place it in a frame for one-of-a-kind art!
Marble paper science projects require adult supervision, but they are super easy. In fact, this is a great science project for the whole family. Toddlers through adults can all try their hand at marble paper science.

Marbled Paper Project #1
Cornstarch & Alum
What You Need:
- Plain non-glossy white paper
- Cornstarch
- Water
- Fork
- 600 ml beaker
- Paint brush
- Alum
- Food coloring or acrylic paints
- Medicine dropper or pipet (if using acrylic paints)
- Large shallow pan
- Toothpick, comb, fork, chop sticks, paint brushes, or the like
- Newspaper
- Iron (optional)
What You Do:
1. Use the fork to mix 1 tablespoon (15 g) of alum into 2 cups (~475 ml) of warm water in the 600 ml beaker until it’s completely dissolved. Clean the fork and beaker and set aside.
2. Make a small mark on one side of the paper with a pencil. Use the brush to lightly coat the marked side of the paper with the alum solution.
3. Allow the paper to fully dry (about an hour). If the paper is more wrinkled than you’d like, have an adult help you iron it between two plain sheets of paper on the low setting.
4. Create a size by combining 1/4 cup (2 oz) cornstarch with 1/4 (~60 ml) cup cold water in the 600 ml beaker. Stir with the fork. Once it’s well mixed, add 2 cups (~475 ml) cups hot water. Mix until the solution is syrupy and pour in the shallow pan.
5. Next, drop the food coloring into the size. Use 1-4 colors. If you’re using acrylic paint, thin it out with water first, so it’s the consistency of milk and use a dropper to put it onto the solution. Alternatively, you can try dipping a brush into the paint and gently tapping the handle over the solution. You want the paint to float on the surface of the cornstarch solution.
6. Use the comb, chopsticks, etc., to swirl, rake, and otherwise distribute the paint across the solution’s surface. Avoid disrupting it so much that the individual colors are no longer visible.
7. Carefully lay the paper, marked side down, into the size, smoothing it out so that no bubbles remain. Leave it for 30 seconds or so.
8. Lift the paper from the solution and rinse off any excess size with a gentle stream of water. Repeat step 3.
9. Place a sheet of newspaper in the solution to absorb any excess paint, and repeat steps 5-8.
What Happened:
First, you prepared the paper with a mordant, a substance used to set dyes. Mordants are used to set dye on fabrics and paper and to augment staining of cell and tissue samples. Since we used the mordant before the dying process, it’s called
pre-mordanting or onchrome. Meta-mordanting, or metachrome, means the mordant is included in the dye, and post-mordanting, or after-chrome, is when mordant is applied following the dying process.
Once the mordanted paper was dry, you transferred a paint design from a viscous solution’s surface to the paper. You did this by making a size, or a substance used to alter the way the paper interacts with liquids. Specifically, the size slows the paper’s absorption rate, allowing the paint to adhere to the paper’s surface rather than being absorbed. Since the size has higher density than the paint, the design you made sits atop the size. Can you think of other materials you could use to make a size for your marble paper science project?

Marble Paper Science Project Tips:
- If your water stream isn’t gentle enough, it will wash off some of your paint, too!
- A common mistake is layering the paint too thick atop the size; a little goes a long way.
- Try making the classic nonpareil pattern by first raking the length of your size container, then carefully raking the width.
Marbled Paper Project #2
Shaving cream
Another less-precise marble paper science project uses shaving cream as the size. Here’s how.
What You Need:
- Shaving cream
- Shallow pan or wax paper
- Ruler or spatula
- Food coloring or paint
- Paper
- Water
What You Do:
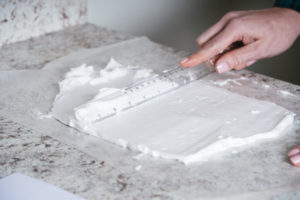
1. Dispense a mound of shaving cream in a shallow pan or on the wax paper.
2. Level it out with a ruler or spatula as best you can.
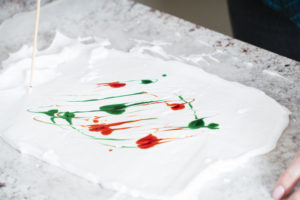
3. Drop food coloring or paint onto the shaving cream and swirl it. Take care not to mix the colors too much.
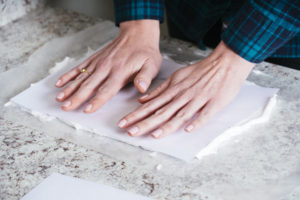
4. Carefully press the paper into the shaving cream, smoothing out bubbles. Leave it on for a minute or so.
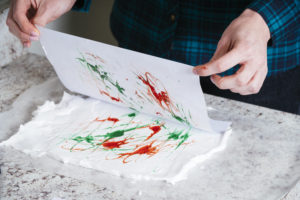
5. Lift the paper off. Gently rinse under running water and let dry.
6. As above, have an adult help you iron it between two clean sheets of paper, if you wish.
Both downloads:
Download the directions for the marble paper science project with cornstarch.
Download the directions for the marble paper science project with shaving cream.