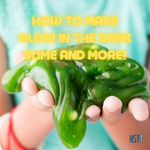
Making glow-in-the-dark slime will be a project that will bring all of your kids running! We’ve tackled slime making in the past but this glow in the dark recipe will be one you’ll want to add to your library. It’s a basic recipe that has an added glow-in-the-dark powder for some super glowing slime!
There are so many different kinds of recipes you can make! We’ll cover glow-in-the-dark, an Ultraviolet recipe with color-changing beads, and glitter slime in this post, but you can find many more recipes in this article that include these types: Simple Slime, Super Slime, Glooze Slime, Oobleck Slime, and Fluffy slime.
Our hands-on Slime Recipe Kit for Kids is complete with all the ingredients you need – including lab-quality chemicals, containers, and instructions for making Simple Slime (putty-like texture) and Super Slime (clear & gooey). To make Glooze (slimy & ooze-like) and Oobleck (resembles quicksand), simply add kitchen staples, like corn starch, skim milk, vinegar, and baking soda!
Let’s get started!

How to Make Glow in the Dark Slime
Supplies needed:
- Small mixing bowl (or plastic mixing cups for easy cleanup!)
- Glow in the dark powder (can be found on Amazon)
- Measuring cup
- Green food coloring
- Liquid laundry starch
- Elmer’s clear glue
- Mixing sticks (for easy cleanup mixing!)
What to do:
- Place your bowl on the table. Add one cup of glue and 1/2 cup of water into the bowl.
- Add drops of food coloring (green, one or two drops will do) and your glow-in-the-dark powder and stir.
- Fill your measuring cup 3/4 of the way full of starch. Carefully pour the starch into the glue cream mixture while you stir.
- It’s easy to add too much starch to slime, so stop adding starch as soon as the slime “gels.” But, if your mixture is really sticky, you may need to add a bit more starch.
- Place the mixture outside in bright sunlight for an hour, then bring it back inside.
The slime will be green in daylight, but when you bring it back into a dark room, suddenly, it will start to glow! The longer you leave the slime in the sun the brighter and longer it will glow in the dark. Be sure to store your slime in an airtight container or a ziplock plastic bag.
How to Make a Recipe with Color Changing UV Beads
This slime recipe would be a great compliment science experiment to a study about UV rays. The UV beads in this recipe contain small amounts of a photochromatic color-changing pigment that reacts with the presence of ultraviolet (UV) rays. All you need is natural light! This super stretchy mixture is lots of fun to play with and gives an added bonus of calming sensory texture to the slime.
Supplies needed:
- 1 Bottle of Elmer’s PVA Glue (clear glue for a more clear product or white glue for a milkier product)
- Baking Soda.
- Saline Solution.
- Water
- UV Color Changing beads
What to do:
- Mix a 1/2 cup glue with 1/4-1/2 cup water.
- Stir in about 1/4 tsp baking soda.
- Measure out 1/4-1/2 cup color activating beads. More beads will make for a firmer end product and fewer beads will preserve the stretch a little more.
- Add up to 1/2 Tbsp of the saline solution to the mixture and stir.
- When you see the mixture pull away from the sides and bottom of the bowl you can knead it to perfection! The result of this slime will be rubber-like.
Once your slime is complete, put it in a container and take it outside into the sunshine. You’ll begin to see the beads change color from the UV rays. Depending on the time of day and the strength of the UV rays, the color will be deeper or lighter in color. Be sure to see what your beads do on a cloudy day, too. Is there still UV available to color the beads?
What’s the science behind the slime?
The borate ions in the slime activators (sodium borate, borax powder, or boric acid) mix with the PVA (polyvinyl-acetate) glue and forms this cool stretchy polymer.
The glue is a polymer and is made up of long, repeating, and identical strands. These molecules with flow past one another keeping the glue in a liquid state until you add the borate ions to the mixture, where it starts to connect these long strands together. They begin to mix until the substance is less like the liquid you started with and thicker and more rubber-like, like slime!
Picture the difference between wet spaghetti and leftover spaghetti the next day. As the slime forms, the tangled strands are much like the clump of spaghetti – all sticky and stuck together!
Is slime a liquid or solid? We call it a Non-newtonian fluid because it’s a little bit of both!
Learn More about Non-Newtonian Liquids!
A non-Newtonian liquid is a substance that acts like a liquid in some situations but as a solid in others. Quicksand is an example of a non-Newtonian liquid. It appears to be solid, but if you stand on it, you slowly start sinking as if it were a liquid.
Polymers are what make non-Newtonian liquids unique. A polymer is a long string of molecules that can exist as a liquid or a solid. The term polymer comes from the Greek words for “many parts.” Liquid polymers act as a liquid until particular chemicals are added, which create links between the molecules. These links transform the compound into a hybrid between liquid and solid.
Since the molecules are now connected, they cannot move as freely, which gives them the strange properties found in slime. The new compound is called a non-Newtonian liquid.
How to Make a Glitter Recipe
Supplies needed:
- Washable clear glue
- Sodium Tetraborate (Borax)
- Glitter
- Water
- Container, measuring cup, and mixing stick
What to do:
- Add 1/2 cup of glue to a container (plastic cup/bowl is best for easy cleanup!)
- Mix in 1/2 cup water and stir
- Add your glitter and be generous! If you’d like, you can also mix in food coloring.
- Add 2 tsp of sodium tetraborate to your glue mixture.
- Stir your slime mixture until it’s too thick to stir with the stick and switch to using your hands. It should be a thick, stretchy consistency when you’re done.
As with any of the slime recipes here, be sure to store them in a plastic bag or air-tight container. It will last even longer if kept in the fridge.
Slime is a polymer and polymers can make for some very fun DIY projects! Polymers are very large molecules, formed by repeated patterns of chemical units strung together. Although “polymer” might bring to mind rubber or slime, did you know that there are polymers all around us, including inside our bodies? The protein DNA, which is the “blueprint” for cellular reproduction, is a naturally-occurring polymer. The protein casein, in cow’s milk, is a polymer as well. Other natural polymers are cellulose and starch. Bone, horn, cotton, silk, rubber, paper, and leather all come from naturally-occurring polymers!
What’s your favorite slime recipe?
